
How To Build Bunk Beds Attached To The Wall? are a space-saving solution ideal for small rooms. They provide a secure sleeping arrangement while maximizing floor space.
Are you looking to optimize your bedroom space? How To Build Bunk Beds Attached To The Wall? offer a stylish and practical way to create room for sleeping without sacrificing style.
How To Build Bunk Beds Attached To The Wall? combine safety and functionality, making them perfect for kids’ rooms or guest spaces. This innovative design frees up floor space, allowing for additional furniture or play areas.
Understanding Wall-Mounted Bunk Beds
What Are Wall-Mounted Bunk Beds?
Wall-mounted bunk beds are a unique solution for maximizing vertical space in a bedroom. Unlike traditional bunk beds that sit freestanding, these beds attach securely to the wall, offering stability and safety. This design is ideal for smaller rooms, such as children’s bedrooms or guest rooms, where floor space is limited.
Benefits of Wall-Mounted Bunk Beds
- Space-saving: They free up floor space, allowing for additional furniture or play areas.
- Safety: Properly installed, they offer a secure sleeping environment, minimizing the risk of tipping.
- Customization: You can design them to fit your room’s aesthetics and requirements.
- Versatility: Perfect for kids’ rooms, guest rooms, or even studio apartments.
Planning Your Bunk Beds
Step 1: Measuring Your Space
Before diving into the project, take accurate measurements of your room.
- Ceiling height: Ensure that the distance from the floor to the ceiling allows enough vertical space for the upper bunk.
- Wall length: Measure the wall where you plan to install the beds to ensure they will fit comfortably.
- Floor space: Consider how much room you’ll need for access and any additional furniture.
Step 2: Choosing Your Design
Consider the following styles:
- Traditional Bunk Bed Style: Classic two-level beds with a ladder for access.
- L-Shaped Bunk Beds: One bed perpendicular to the other, maximizing corner space.
- Loft Beds: One elevated bed with space underneath for a desk or play area.
Step 3: Materials Needed
Gather the necessary materials for your project. Here’s a list of essentials:
- Wood: Plywood, 2x4s, or 2x6s for the frame.
- Screws and bolts: Heavy-duty screws to ensure the structure is secure.
- Wall brackets: These will provide additional support for the bed frames.
- Mattresses: Choose appropriate sizes for both levels.
- Ladder: You can build one or purchase a ready-made option.
Step-by-Step Instructions on How to Build Bunk Beds Attached to the Wall
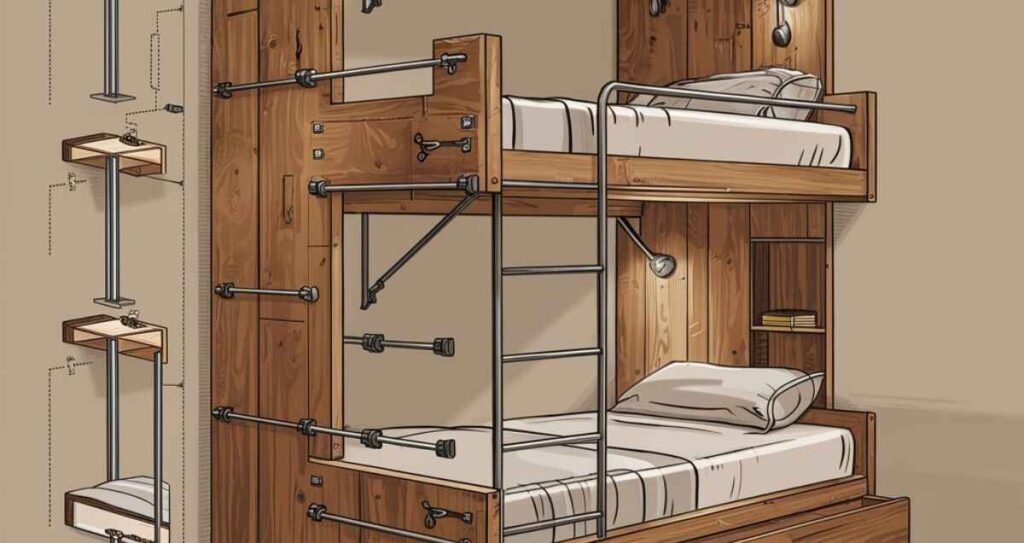
Step 1: Build the Frame
- Cut the Wood: Use a circular saw to cut the wood to your desired lengths. The dimensions will vary based on your room size and design choices.
- Assemble the Base: Create a rectangular frame for the lower bunk. Use screws to secure the corners.
- Add Support Beams: Place horizontal support beams in the middle of the frame for added strength.
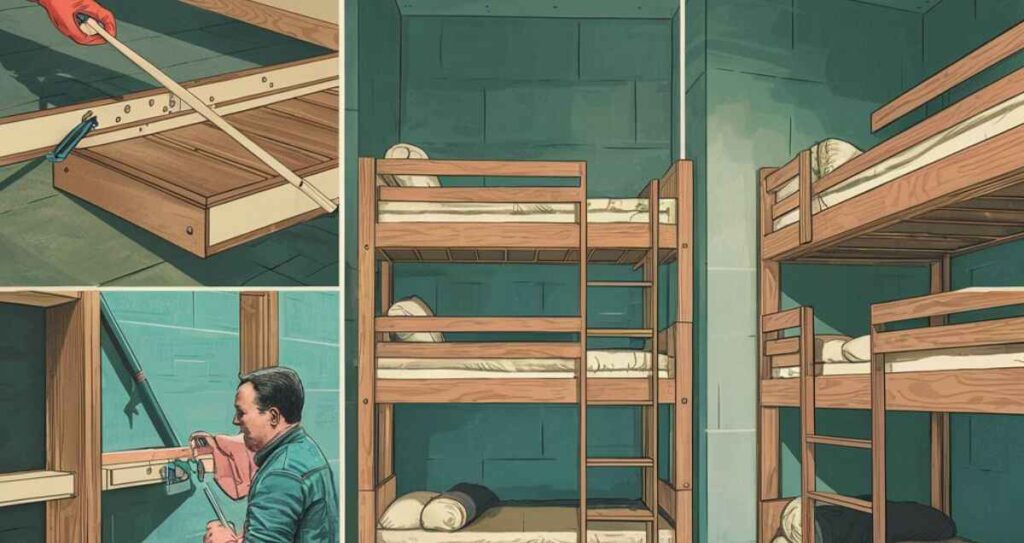
Step-2: Attach the Frame to the Wall
- Locate the Studs: Use a stud finder to identify wall studs. Mark their locations; this is crucial for stability.
- Mount the Frame: Position the frame against the wall and use heavy-duty screws to attach it securely to the studs.
- Check for Level: Ensure the frame is level before tightening all screws.
Step-3: Build the Upper Bunk
- Create the Upper Frame: Follow the same steps as the lower bunk to construct the upper frame.
- Add Wall Brackets: Install wall brackets to secure the upper bunk to the wall. This step is essential for safety.
- Attach the Frame: Mount the upper frame, ensuring it aligns perfectly with the lower one.
Step-4: Add the Ladder and Guardrails
- Build the Ladder: Use 2x4s to create a sturdy ladder that will provide easy access to the upper bunk.
- Install Guardrails: Attach guardrails around the upper bunk for added safety.
Step-5: Finishing Touches
- Sand and Paint: Sand down any rough edges and paint or stain the wood to match your room decor.
- Add Mattresses: Place the mattresses on both bunks.
- Decorate: Personalize the space with bedding, pillows, and wall art to create a cozy atmosphere.
Safety Considerations
Building bunk beds attached to the wall is not just about aesthetics; safety is paramount. Here are some safety tips to keep in mind:
- Use quality materials: Invest in strong, durable wood to ensure longevity.
- Regularly check screws: Periodically inspect the bed for loose screws and tighten as needed.
- Age-appropriate design: Make sure the design is suitable for the age of the users, particularly for kids.
- Install secure guardrails: Ensure guardrails are high enough to prevent falls, especially on the upper bunk.
Case Study: A Family’s Transformation
Background
The Johnson family lived in a small three-bedroom apartment in Brooklyn. With two kids sharing a room, they struggled with space. The parents decided to build bunk beds attached to the wall to create more usable floor area.
Design and Execution
They opted for an L-shaped design to fit snugly in a corner. Using plywood and 2x4s, they built a sturdy frame, attached it to the wall, and installed a custom ladder. The kids loved the idea of having their own “fort” and personalized their bunks with colorful bedding and wall decals.
Result
The transformation not only maximized space but also created a fun, inviting area for the kids. The family was thrilled with their new setup, which allowed for more play space in their compact room.
Conclusion
Learning How To Build Bunk Beds Attached To The Wall? opens up a world of possibilities for optimizing your living space. With careful planning, the right materials, and a bit of creativity, you can create a stylish and functional sleeping area that meets the needs of any household.
Whether you’re designing for children or creating guest accommodations, wall-mounted bunk beds offer a practical and attractive solution. So roll up your sleeves and get started on this rewarding DIY project!
David Mark is a seasoned home improvement expert and the creative mind behind DesignersParadise. With a keen eye for design and a passion for transforming spaces, David offers practical advice and innovative solutions for creating beautiful, functional homes. His insightful articles and tips aim to inspire and guide readers in enhancing their living environments, making every home a true reflection of style and comfort.